(For homeowners, DIYers, and anyone tired of worrying about water safety)
You ever turn on the tap and wonder if what’s coming out is as clean as it should be? Most of the time, it is—but sometimes, especially after heavy rain or pressure changes, backflow happens. And that’s where the trouble starts.
If you’re here, you’re probably dealing with it—or trying to prevent it. Good on you.
Installing a backflow valve is one of those plumbing jobs that sounds technical, but really, it’s not as complicated as you’d think. Once you understand how to install a backflow valve, the whole process feels a lot less intimidating.
But First… What Even Is a Backflow Valve?
Think of it like a one-way door for your water. Clean water flows in, and if pressure drops for any reason (like a broken main or a fire hydrant being used nearby), that water could start reversing direction.
Without a backflow preventer, that dirty water—stuff from sprinklers, garden hoses, even fertilizer runoff—can slip back into your home’s clean supply. Gross, right?
Whether you’re in a regular family home or dealing with commercial backflow protection at a shop or rental unit, this little valve keeps the bad stuff out.
How to Install a Backflow Valve?
In most cases, yes. Especially if it’s for a residential backflow setup, like an outdoor irrigation line or near your main water supply. You don’t need to be a plumber, just a bit handy and not afraid of getting your hands dirty.
But if you’re working with commercial systems, old pipes, or high-pressure lines—well, maybe call in a pro. Better safe than flooded.
What You’ll Need (No Fancy Tools, Promise)
You don’t need to clear out the whole garage for this. Just grab:
- A backflow preventer valve (check your pipe size)
- Teflon tape
- A wrench or two
- A pipe cutter (or a hacksaw, if that’s what you’ve got)
- A rag or towel (trust me, you’ll want it)
- Maybe a helper if you’re under a crawl space or awkward spot
Let’s Get Into It: Installing Your Backflow Valve

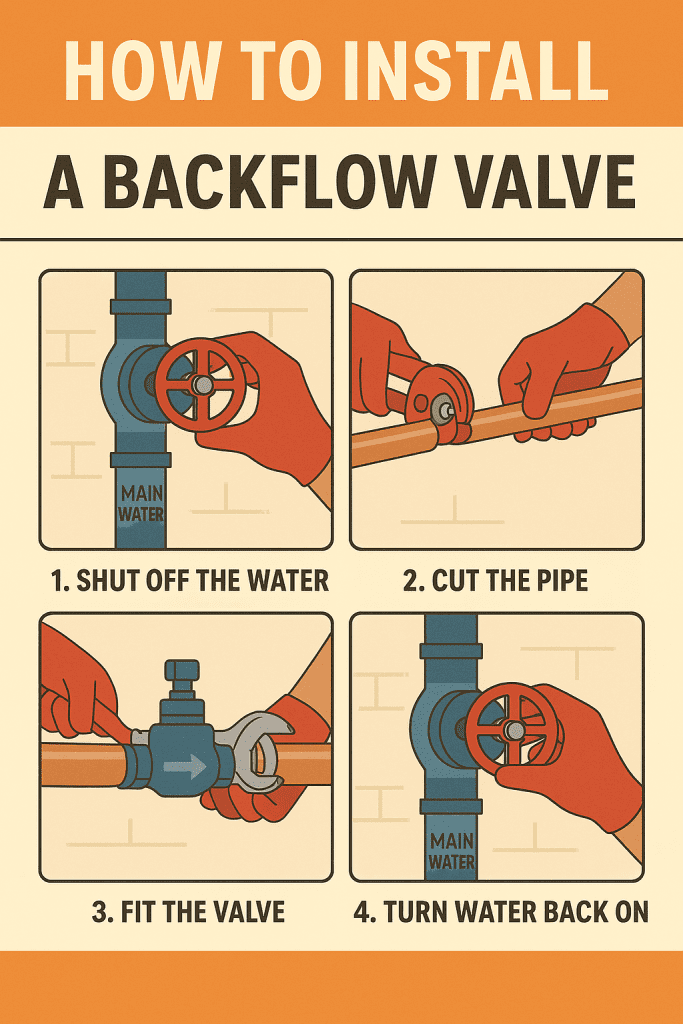
1. Shut Off the Water
Seriously, this is step one. Don’t skip it. Head to your main shut-off valve and turn it clockwise until it stops. Open a tap to drain any leftover pressure.
2. Cut the Pipe
Find the section of pipe where you’ll place the valve—usually after the shut-off or near your irrigation line. Measure, mark, and cut. If you’re nervous about this part, take your time. Better to go slow than have to patch up a mistake.
3. Wrap the Threads
Grab your Teflon tape and wrap it around the valve threads. A couple of times is enough—this helps seal the connection and keeps leaks at bay.
4. Fit the Valve
Position the valve in line with the pipe (look for an arrow that shows which way water should flow). Then tighten it in place with your wrench. Don’t crank it too hard—you want it snug, not stressed.
5. Turn the Water Back On
Once it’s all hooked up, turn the main water supply back on slowly. Watch for drips or little leaks. A dry rag helps here—run it along the connections and see if it picks up any moisture.
What If It’s Leaking?
So, your new valve is dripping. That’s not unusual. Here’s what you do:
- Turn off the water again.
- Loosen the valve and check the Teflon tape—is it bunched up or missing?
- Rewrap it and reinstall.
- Test again.
Still leaking? You might’ve overtightened something or cracked the threads. Worst-case scenario: swap out the valve. Happens more often than you’d think.
Why Testing Your Backflow Valve Is a Big Deal
Installing a valve is great. But checking on it? That’s where a lot of folks slip up.
Backflow valves should be tested once a year, especially for commercial properties. Here’s why:
- They can wear out quietly
- A faulty valve puts your whole water supply at risk
- You might be legally required to do it (check your local codes)
- It helps spot small issues before they become big plumbing bills
If you’re wondering, “Do I really need to test it?” The answer is probably yes.
A Real-Life Example (Because We’ve All Been There)
A friend of mine skipped installing one on his sprinkler line. Everything seemed fine… until it wasn’t. One weekend after fertilizing the lawn, the kitchen tap started smelling like, well, fertilizer. He had to flush the whole system, replace some piping, and—yep—install a backflow valve after all.
Could’ve avoided it for $50 and 30 minutes of effort.
Final Thoughts
Installing a backflow valve isn’t the flashiest job, but it’s one of those small, protective steps that pay off big in the long run. Especially when you live somewhere with older infrastructure or deal with pressure changes often.
It’s a DIY win. And even if you mess it up once or twice, you’ll learn as you go—and your water will be better off for it.
Common Questions (You’re Not the Only One Wondering)
Q: Can I install a backflow valve myself?
Yes, for most homes. But for commercial buildings or complex plumbing setups, call in the pros.
Q: How long does it take?
Maybe an hour, start to finish. Less if you’ve done it before.
Q: Is testing required?
In many places, yes—especially for commercial backflow systems. Homeowners should still check annually.
Q: How do I know it’s working?
No leaks? Arrow pointing the right way? No strange water taste or smell? You’re probably good. But testing gives you peace of mind.
Author
-

James is a certified backflow specialist with over 20 years of hands-on experience in plumbing safety.
He’s passionate about educating homeowners and businesses on the importance of clean water systems.
James simplifies complex maintenance tips through clear, practical advice.
When he's not writing, you'll find him inspecting valves or training the next generation of backflow testers.

